Practical GD&T: Flatness Measurement – Basic Concepts
Flatness, in GD&T, is a measure of how closely a given surface is to a perfect 2D plane. That plane can be at any angle in 3D space and need not be a horizontal plane. Flatness is sometimes referred to as ‘planarity’.
GD&T symbol
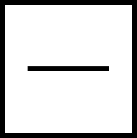
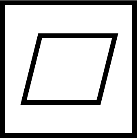
A flatness control is indicated by a feature control frame (FCF) with the symbol shown below. Note that flatness must be specified with a tolerance, which is the numerical value to the right of the symbol. A flatness control is stand-alone. It does not reference back to any other feature or datum on the part. The feature control frame does not include any other references.

Note that you might also see flatness applied as a ‘per unit’ control, in which case an extra number will appear on the right. Think of this as a smaller, moving tolerance area which must be satisfied anywhere on the surface locally. This will normally be a tighter tolerance than the overall flatness on the surface.

Drawing callout
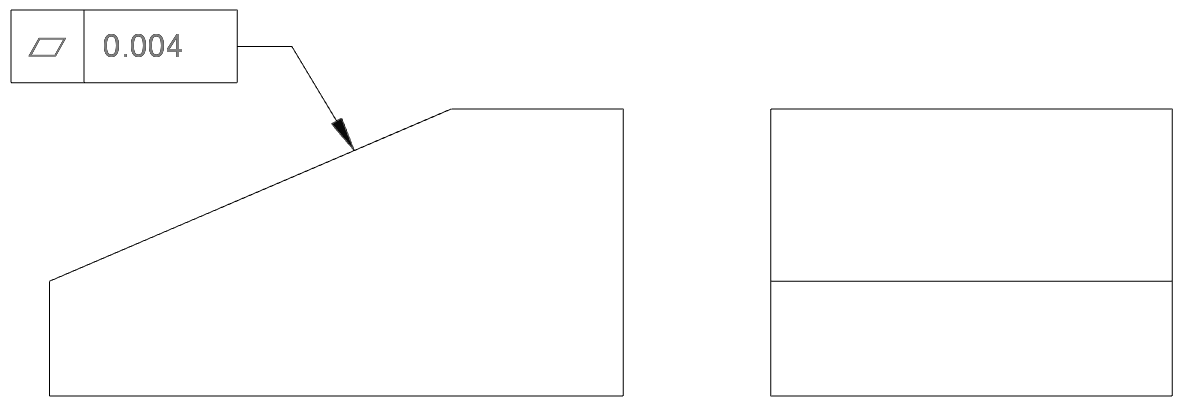
A typical flatness callout on a drawing print (2D views) is shown below:

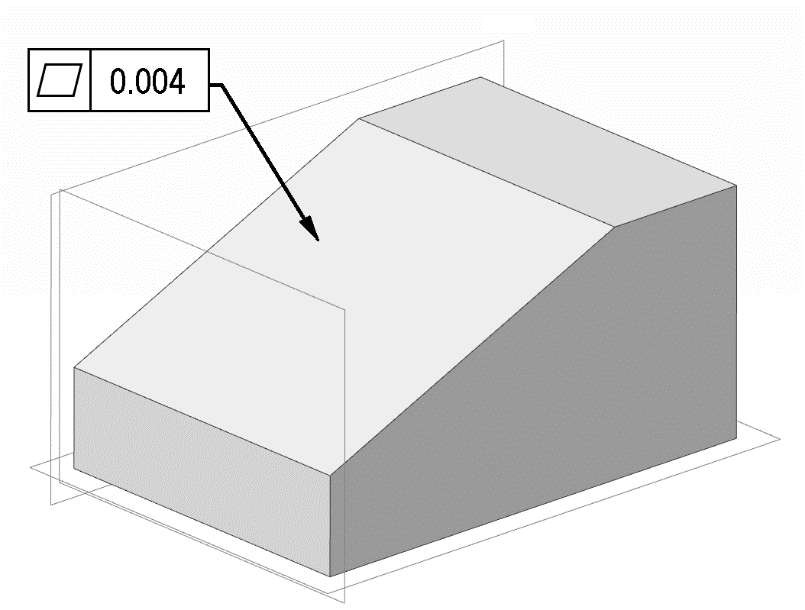
Keep in mind that a flatness measurement is almost always a 2D measurement in 3D space (it is sometimes measured using a 1D curvilinear scanning path, although this gives limited coverage). As well as on 2D prints, you may also encounter flatness callouts directly in a 3D CAD model.
A flatness callout with no other information should be interpreted to mean that the flatness control applies to the entire surface. Flatness may be expressed as a local rate over a larger area (e.g. a zonal flatness of ‘x’ microns per millimetre).

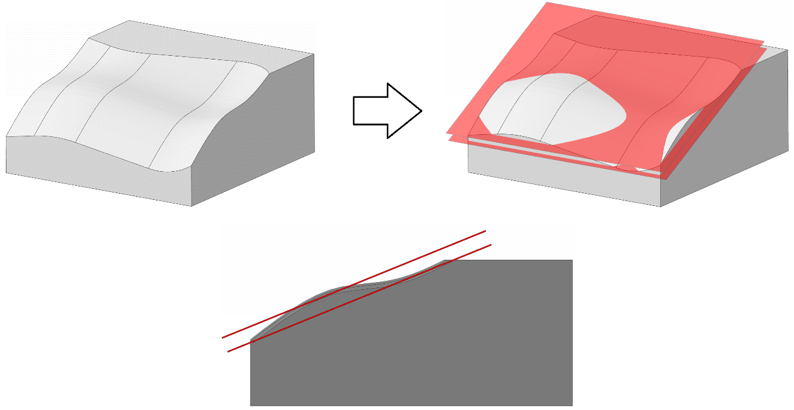
The flatness tolerance zone is visualised as two parallel planes, spaced apart by the number indicated in the flatness control. If all measured points on the surface lie within the tolerance band (i.e. between these two parallel planes) the part is a ‘pass’.

Note that just because the surface may have a nominal angle on your CAD or drawings, the two planes need not be oriented at that exact angle, as long as they are parallel to one another. The below shows a 3D view of a surface that cannot be bounded between the two tolerance planes; this is a fail.

Where can flatness be applied?
Flatness can apply to any surface (or any area of a surface) that is nominally flat, whatever the orientation of that plane. A flatness requirement can apply to an entire surface, or just to a small sub-section of a face (this latter case can create some challenges for measurement with some traditional flatness gauging tools). It can also apply over several discontinuous faces, treating them as a single continuous plane (a ‘common zone’ tolerance) The images below show examples of surfaces to which a flatness control might apply.

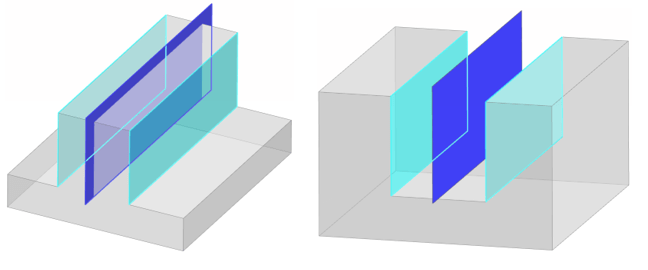
Flatness can also be applied to certain specific ‘virtual’ features. For instance, where two flat surfaces are parallel but offset, the derived median plane between the two faces can be controlled with a flatness callout. The images below show this with the two lighter blue planes (actual part surfaces) forming the derived median plane (the ‘virtual’ plane shown in darker blue):

What standards apply to GD&T flatness?
For more details, see ISO 12781, and ASME 14.5-2018, Section 8. Be aware also of the tolerancing classes for straightness and flatness specified by ISO 2768.
Flatness vs straightness
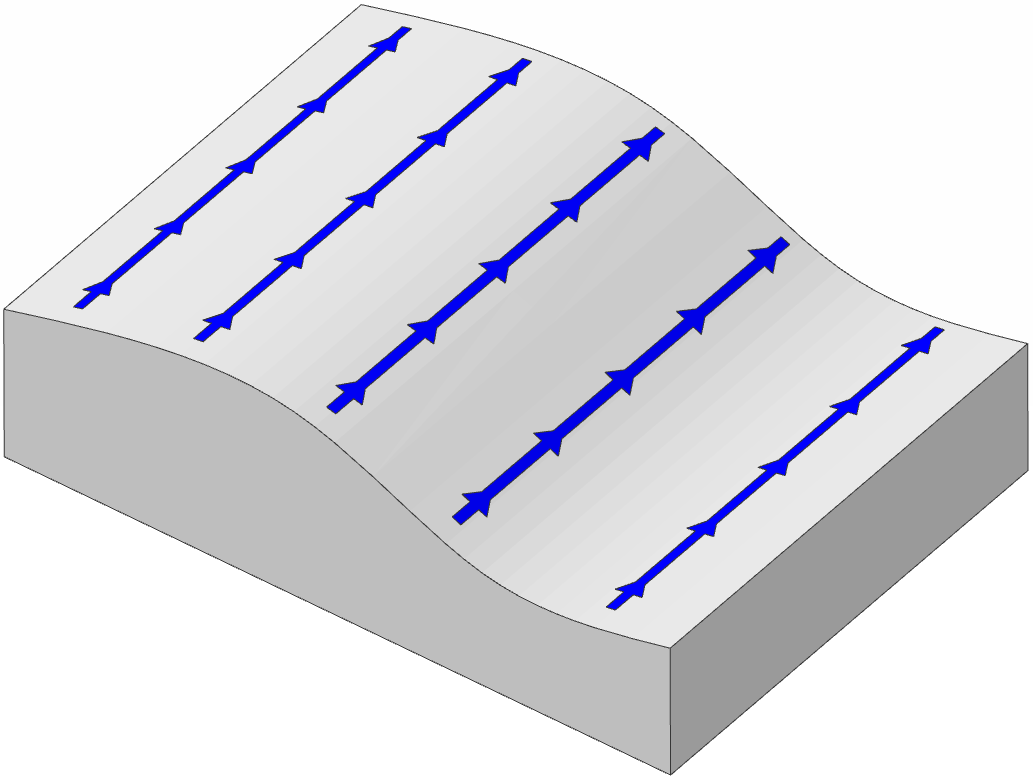
Flatness is often described as being “the 2D version of straightness”. A straightness requirement applies to a 1D (linear) surface trace or axis in 3D space, whereas a flatness requirement applies to a 2D (planar) surface in 3D space. A flatness measurement can be approximated by a series of straightness line-measurements but note that the two will not be the same. Each straightness scan would be evaluated independently, and the resulting lines need not be co-planar with one another.

Above: each of these linear scans could report an individual ‘pass’ for straightness, but a flatness control with the same data combined could report a ‘fail’.
Flatness vs profile of a surface
Another alternative to using a flatness control is to use the generic profile of a surface constraint. Applied to a planar surface, this will achieve many of the constraints on surface form which a flatness callout can. However, it is less immediately accessible and understandable when reviewing an engineering print, so the more specific flatness control is a better choice where it applies.
Interested in fast and accurate measurement of precision components with an optical CMM? Try the OmniLux range of coordinate measuring machines.
Overview of GD&T
For an overview of GD&T including the other symbols, please see our practical guide.






Special case: Sphericity


