Practical GD&T: Profile of a Line – Basic Concepts
‘Profile of a line’, or sometimes just ‘line profile’, refers to a specific tolerance control used in GD&T drawings to constrain the form of a 2D profile based on some nominal reference (e.g. a CAD model). Along with surface profile / profile-of-a-surface, it allows controls to be applied to much more complex freeform geometries (e.g. biomimetic surfaces in orthopaedics, or aerodynamic surfaces in aerospace).
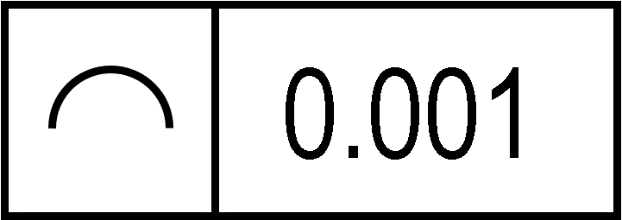
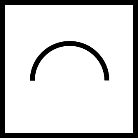
Profile of a line GD&T symbol
The line profile symbol graphically depicts an arc segment, but this callout is not restricted to any particular shape; the line profile in question could just as easily be a straight line. The image below shows the most basic form of the control:

Note that this is a ‘bare minimum’ with just the symbol and a numerical tolerance. Depending on how the control has been designed, it may also contain additional datums and modifiers (e.g. min/max material conditions). In practice, some datums will almost always be included, to avoid ambiguity about inspection (see below).
Drawing callout
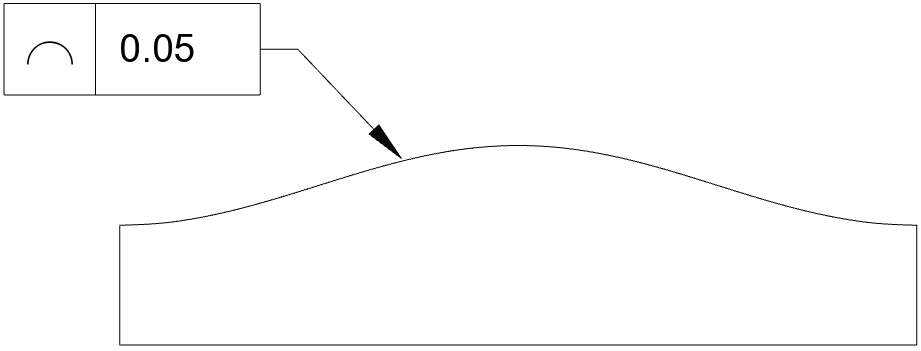
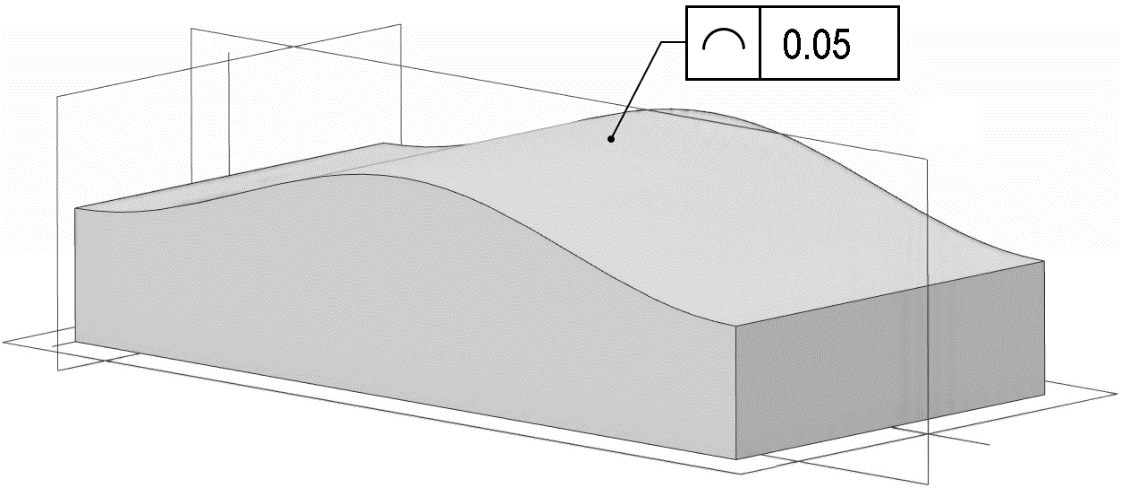
The drawing below shows that ‘bare minimum’ tolerance frame for profile-of-a-line for an example geometry, as a 2D projection for a blueprint drawing, and also on a 3D CAD model.


There are two important things to note here.:
Firstly, considering the 3D CAD example, note that the direction of the surface profile control must be indicated and should not be left ambiguous. In this case, the profile could be a curved ‘bump’ or the straight line form in the orthogonal direction. (A similar ambiguity can be encountered for the straightness constraint).
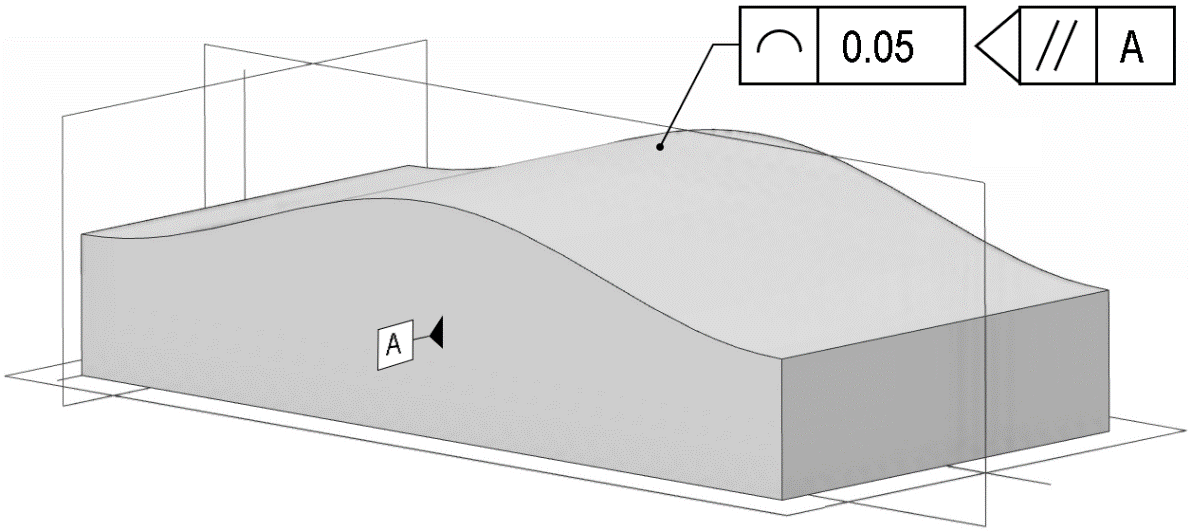
This ambiguity can be addressed in different ways; under the ASME standard, the use of a datum plane can control the inspection orientation; in the ISO standards an orientation plane indicator may be used. These two methods are illustrated below but refer to the standards for full details on this, as the way the orientation is defined can have a subtle effect on the outcome of inspections.


The second point is perhaps more fundamental; note that even on a well-controlled drawing with no ambiguity, it is not possible to perform an inspection from the drawing alone, as insufficient information has been provided. The “profile of a line” control explains how to inspect to a profile, but it gives no information on what that profile is. In this respect profile of a line and profile of a surface are unique amongst the GD&T controls, in that all the others are self-contained; a cylindricity or flatness constraint needs no additional information, as the ideal ‘form’ is a perfect geometry primitive. This is commonly not the case for profile of a line/surface.
In the above example, the definition of that curved profile must be provided for the inspector. This could be done by either:
- Providing an accurate CAD model,
- Providing a ‘look up’ table of points on the surface
- Providing a mathematical equation for the profile
A mathematical equation gives a perfect form with infinite resolution, and is the ideal where applicable; however, the equations for a freeform surface may be too complex for this to be practical
If a look-up table is used, it must be high-enough resolution that interpolation errors have minimal effect. This is a function of the width of the tolerance zone; the more precision required, the more important this is.
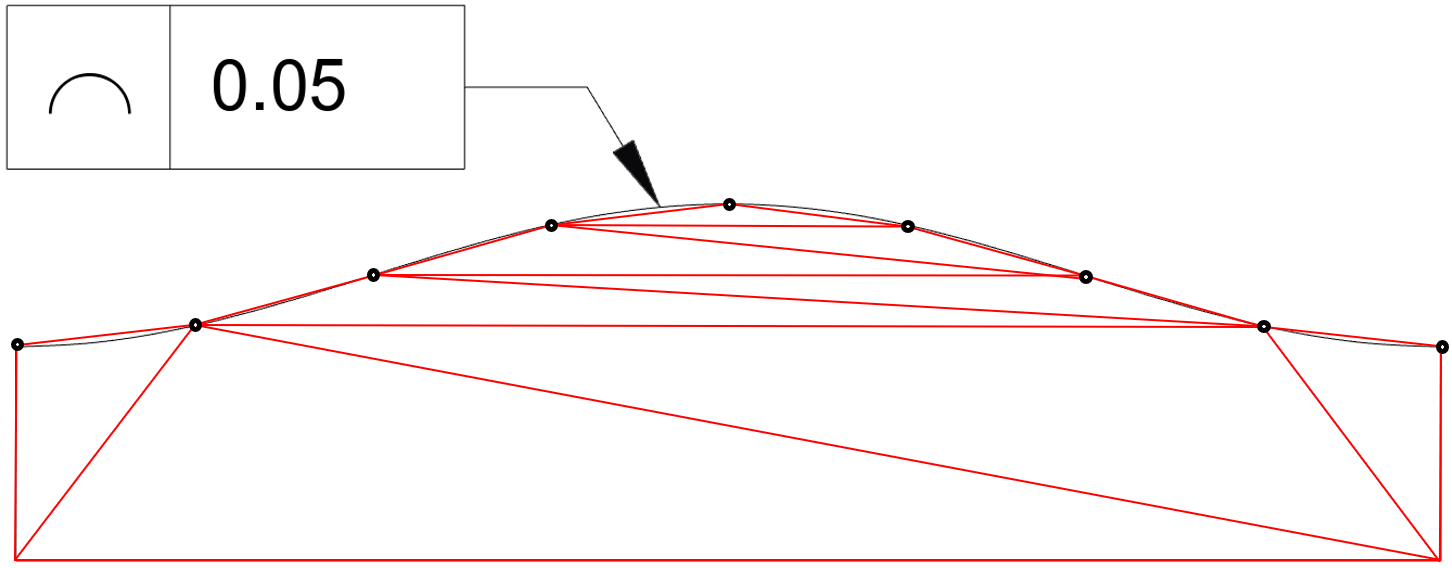
If a CAD model is used, ensure that it has been exported in a high-fidelity format; a low-resolution facetised model cannot capture the form of a smooth curve, as the below mesh illustrates. If the tolerance zone is small, the CAD is not detailed enough to serve as a reference.

The above triangulated mesh cannot capture the smooth surface form
In all cases, the added complication is that two different sources now form the basis for the inspection process. This can have legal/commercial implications for disputes over product quality, and requires careful document control and a good quality system to ensure that these different data sources are not in conflict due to version changes etc. Generally, when reviewing a drawing with profile of a line / profile of a surface controls, always review the source data for the profile as part of the review. This is especially important where the CAD may have been deliberately obfuscated or simplified, to protect sensitive IP or restricted information.
Note that the tolerance zone definition for the line profile is more complex than for other cases. In most other cases, the tolerance zone is a geometric primitive (plane, cylinder, etc) simply scaled or translated relative to one another.
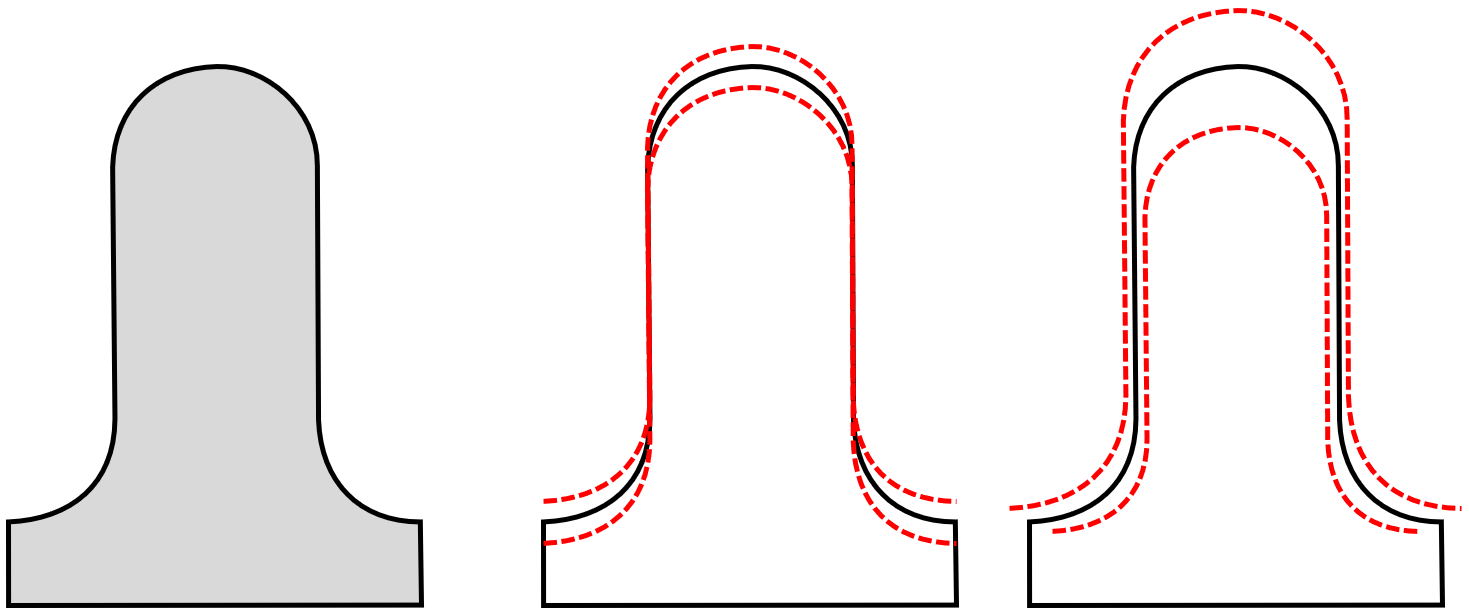
This is not the case for the profile of a line/surface controls. Consider the geometry below; which makes it clear that you cannot achieve a tolerance zone with simple translating and scaling:

Above: for the curved profile (left), translating the profile to form a tolerance zone would give zero tolerance on the vertical side-walls, while scaling the profile gives unequal tolerance all around.
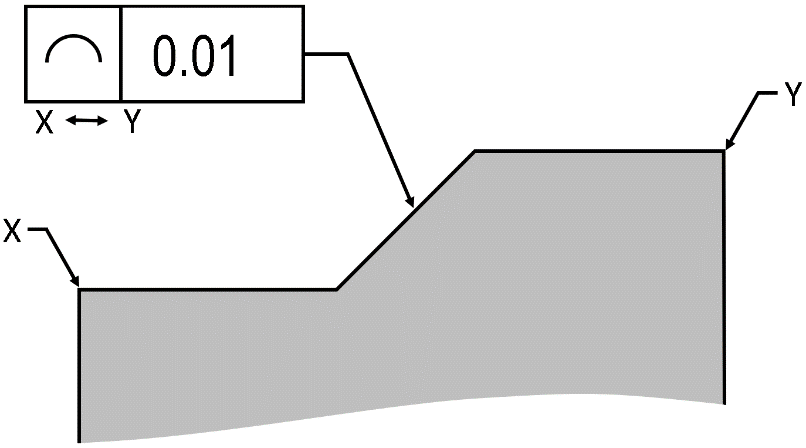
A different strategy is required, but note there are also differences between the strategies the standards employ. Consider the somewhat exaggerated case below, where the ‘line profile’ is a sloped step (normally, this might be broken down into several components each with a different control; in this example it is specifically treated as a single profile).

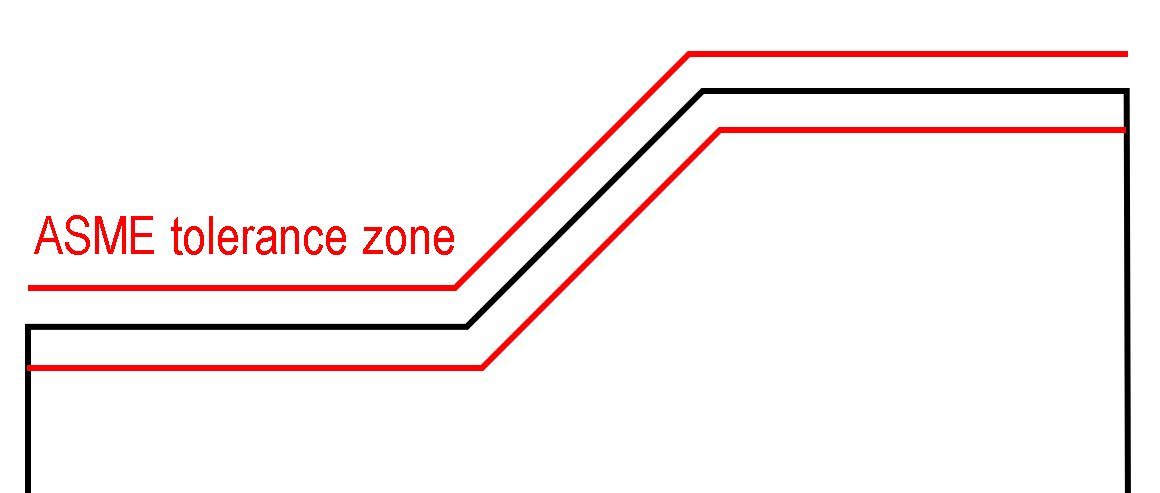
Under the ASME standard, when the profile contains “abrupt surface variations”, the tolerance zone is formed by an intersection of the boundary lines, as shown below. This can gives a tolerance zone of occasional variable width, normal to the surface at any location around those transition zones

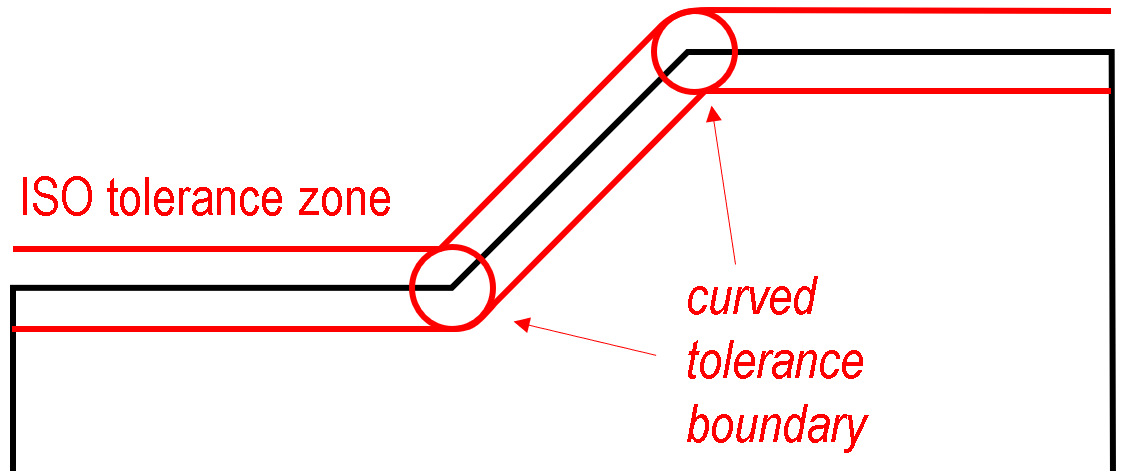
Under the ISO equivalent, the tolerance zone is defined by running a circle (of diameter sized of the control tolerance value) along the ideal profile; this locus of points forms the two tolerance boundaries, as shown. Note that now at the transition the form of the boundary is different:

Note that in either case the actual profile would be allowed slightly curved blend transitions; it is just that in the ISO model the theoretical boundaries also happen to feature a blended curve.
These differences are usually quite subtle on most real profiles, and rarely cause a change in the pass/fail outcome of an inspection check – but they just might, for borderline cases, which is when it is important to know which standard you are inspecting to and the finer details of that standard.
Applications
Profile of a line can apply to many geometries; these can be very simple examples where a straightness or roundness control could also potentially be applicable, or more complex geometries which could not easily be captured by other GD&T controls. The below images illustrate a range of geometries all of which might use a line profile control:

Standards
A lot more could be said about these complex and powerful controls than has been written here. Please refer to the standards for further details.
In the ISO GPS framework, both ‘profile-of-a-line and ‘profile-of-a-surface’ are addressed under the dedicated standard ISO 1660, although helpful additional examples can be found in ISO 1101. For ASME, the line and surface profile tolerances are integrated within the Y14.5 standard along with all other GD&T controls.
Interested in fast and accurate measurement of precision components with an optical CMM? Try the OmniLux range of coordinate measuring machines.
Overview of GD&T
For an overview of GD&T including the other symbols, please see our practical guide.






Special case: Sphericity
